korg tuner
Tuning the Chanter

(updated 02/05/10)
Tuning the chanter
Tuning the chanter is the most important operation in pipe making and should not be hurried. The time taken to get a chanter well tuned and playing at the correct pressure will be amply repaid in the ease of playing that will result.
Tools
There are a number of tools that you will need to have to hand before starting the tuning process:-
  1. Pressure measuring device able to measure the bag pressure accurately between 10" WG and 20" WG. I use a water manometer which can be easily made from clear pipe and a bit of wood.
  2. A 1/8" diameter, medium cut, round, needle file shortened to about 2" long and fitted into a handle leaving about 3/4" sticking out. The file should cut on the push stroke.
  3. A Dremel router fitted with a small, parallel cutting, dental bit. I have found that this tool is easier to use if the flexible drive is fitted. Using this tool can save time but, as it cuts very quickly, I would advise caution - if you haven't used one before you would be better to stick to the hand powered file to under-cut the tone holes.
  4. A small piece of Plasticine to seal the keyed holes whilst the finger holes are tuned.
  5. A tuning reference. - I use a Korg WT 12 Tuner. When I bought this it was a very expensive tool (£120) but now chromatic tuners can be purchases for small dollars at most music shops. The pipe chanter can be tuned just to the drones but its pitch will not be the same as other instruments and any playing with fixed pitch instruments will be impossible. There was a time when the pipes were tuned this way and the normal pitch of a g note was set at some indeterminate amount above concert f (usually a bit under a semitone sharp of f). Nowadays the standard pitch set plays a g note exactly a tone below concert g thus sounding a standard f note.

Preparation of the chanter for tuning
  1. The chanter should be made to the drawing with all of the holes drilled to the given sizes. It is a mistake to start with the holes drilled undersized as this will lead to false notes and other problems. Providing the holes are drilled to the sizes shown and are within about 1/32" of the shown position. It will be possible to produce a well in tune chanter.
  2. The tone holes should be undercut as shown in the diagram. This is to remove the sharp edge where the tone hole joins the chanter bore and should improve the tone of the note. (the corner on the reed side of the junction will be removed during the tuning process)
  3. All the keys should be removed and stored safely.
  4. All the keyed tone holes should be sealed with Plasticine taking care not to extrude any into the bore of the chanter or the tuning will be compromised.
  5. A short, lightly rolled, piece of cotton wool about 3/4" long is inserted into the bore of the chanter at the opposite end from the reed before the endcap is fitted. This kills any unwanted resonances.
  6. Fit the chanter to the bag and check all the parts including the drones for any leaks.
Tuning the chanter
The following procedure is based on the methods shown to me by Colin Ross and additional procedures that I have developed over the tuning of many chanters.
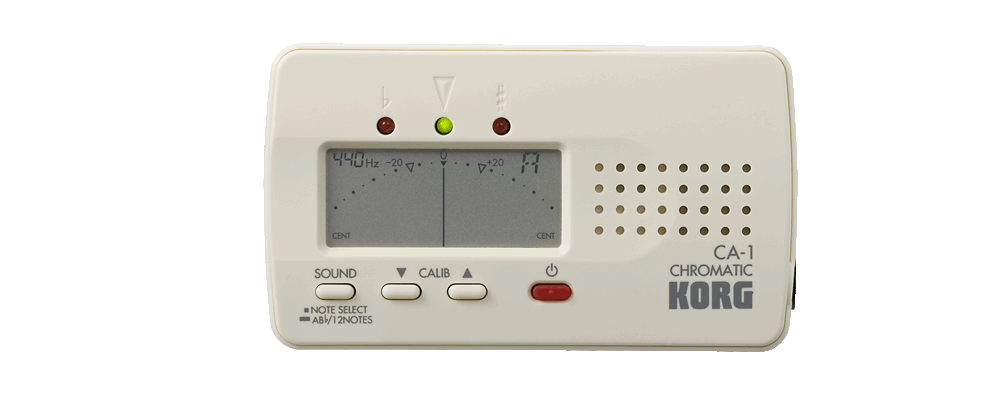
I always use an electronic tuner to measure the pitch and in the following description I will refer to pitch measurement errors in "cents". one cent is equal to 1/100th of a semitone. I aim to achieve an accuracy of plus or minus 3 cents. This sort of error is not offensive to the ear and can be controlled by the player with minute adjustments to the playing pressure. If you have not played the pipes before I would recommend practicing the bellows and bag control by a period of droning (I spent 2 weeks doing this in the garage before I started tuning my first set).
Setting the reed in the chanter
Connect the pipes to the water manometer by removing the sliding part of the small "g" drone and connecting the flexible tube to the end of the standing part. The chanter should be fitted with a good reed. If you are making your first set I would recommend purchasing a reed from a reputable maker. If you explain to the reed supplier that you will be using the reed to tune a new chanter he should be able to supply a reed that has been tried in a chanter and play in tune once your new chanter is tuned. Ask him to supply one to play in concert F pitch at 16" water gauge. If you get your reed from Colin Ross you will be well served.
The reed should be set in the chanter to get the top g and the bottom g as close as possible to an octave apart. Remember that is is really only possible to sharpen a note and the further away from the reed a hole is the less you will be able to sharpen it. The ideal is to have all of the notes just a little flat of their ideal position with the lowest noted very close to the target pitch. The low D can only be sharpened by about 10 to 12 cents before you run out of wood to undercut. The top b can be sharpened by 30 cents easily. Check all the notes carefully to ensure that you have no notes that are sharp. Check especially the c note as the position of this is slightly compromised due the semitone interval between the B and the c. If these holes were in their ideal position there would not be room for the fingers.
If the top notes of the chanter are too sharp relative to the bottom notes the reed should be pulled out of the chanter by a small amount at a time until you achieve a balance.
Setting the reed is the most important part of the tuning as, trying to tune a chanter with the reed badly set is close to impossible, will result in some the tone holes becoming oversize and the resulting chanter unbalanced and hard to play.
Chanter Temperament
Because the chanter plays against a fixed drone it will sound out of tune if it is tuned to even temperament. Even temperament is the method that is used with instruments like the piano to enable them to cope with the mathematical anomaly that the calculated ratio between the root note and it's fifth is 1:4.9 where as the ear demands a ratio of 1:5. On an even tempered instrument this error is lost by making all the intervals between notes slightly different from their ideal pitch so that no error is bad enough to offend the ear.
The pipes, however, are playing in a relatively small number of keys (usually G, A, and D) so the errors do not need to be lost. Most electronic tuners display a zero reading when the note is even tempered so we have to untemper it to avoid a clash with the drones. The following table shows the actual error that should be displayed on an electronic tune when the note is in tune.

NOTE All the notes referred to assume that the pipes are in the key of G. If you are making a set from these drawings the chanter will be sounding 1 full tone flat on the indicated note. The tuner will register an F when the chanter is playing a G.

Tuner Indicated Deviation for Correct Temperament (cents)
      NOTE         b     a     g     f#     e     d#     d     c#     c     B     A     G     F#     E     D  
Needle Reading -14 +4 0 -12 -16 -12 +2 -12 -2 -14 +4 0 -12 -15 +2

Adjusting the tone holes in the chanter
The chanter should be ready for final tuning with a reasonable sounding reed fitted and no leaks. I would recommend that the set is played for 5 to 10 minutes as the pitch of the set will go up as the air in the bag absorbs heat from the body. The set should be connected to the manometer as described in the reed setting section. I would recommend that you aim to get the chanter in tune at a pressure of 16" watergauge. If you have been playing the pipes for some time you may have found a pressure that suits you better and there is no reason why you shouldn't tune the chanter at that pressure. The most important thing to remember is that each note must be in tune at the same pressure. As you get used to playing with the manometer you will find that your ability to hold a stable pressure is improved.
I start by writing down the exact error for each note. The following is a chart of one of the sets I have made with the starting errors that I adjusted by undercutting the tone holes.
You can see that all of the notes are flat. I prefer it this way as I have found that the tone of a note is improved by a slight undercut towards the reed.
Tuner needle reading at start of chanter tuning (cents)
      NOTE         b     a     g     f#     e     d#     d     c#     c     B     A     G     F#     E     D  
ERROR -40 -28 -9 -23 -14 -32 -10 -23 -16 -45 -25 -10 -18 -12 -10
TARGET -14 0 0 -12 0 0 0 -12 0 -14 0 0 -12 -12 0

You will note that the top and bottom "E" notes are tuned differently. This is a matter of personal preference. The top "e" is an interval of a sixth in the key of G and the ear is fairly insensitive to errors in this interval. it is, however, an interval of a fifth in the key of A and the ear demands that this interval is exact. I have found that if the low E is sharp some airs in G that make use of that note do not sound right so I have it tempered to suit the key of G rather than the key of A.
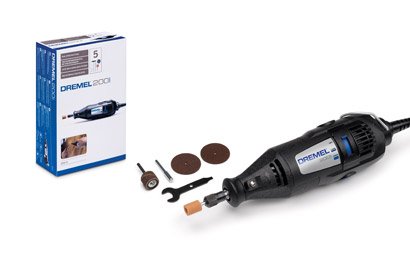
After noting down the actual errors for each note of the chanter I use the Dremel router fitted with the dental bit to undercut the holes towards the reed.


Take care not to gouge the bore of the chanter as you do the undercutting as this can affect the tonal quality of a note.
Repeat the measuring, noting the errors and undercutting the holes until all the notes are within a few cents of their target pitch. Clean out the bore of the chanter frequently (every time before taking measurements of the pitch errors) as a buildup of swarf and dust in the chanter can artificially lower the pitch especially at the bottom end of the chanter.
Once the chanter is close to in tune I would recommend just playing it for several hours the get a feel for where further tuning would benefit the sound. At this stage I usually adjust the holes using the small round file as it is a much more gentle tool.
The following chart shows how I check the notes against the drones.

Final adjustment of the tuning by comparison with the drones
      DRONE         b     a     g     f#     e     d#     d     c#     c     B     A     G     F#     E     D  
Low G + - + x - - x - + + - + - - +
Low A - x - - + - x + - - x - - + x
High d x + x + - - + - - x + x + - x
High e - x - - - - - x - - x - - x -
Tune the note on the chanter to the drone marked thus "+".
Check the note on the chanter against the drone marked thus "x".

I would recommend that the manometer is used for all the tuning as most players pressure can vary plus or minus 2" Watergauge and this can make a note seem out of tune when is is not. Don't be tempted to think that a small error can be compensated for by the player.

Flattening a note that has become sharp
If a note becomes sharp of the intended pitch during the tuning process it can be flattened slightly by the use of a small amount of glue applied to the reed side undercut. Only small adjustments can be made this way but it can save a lot of work if the chanter is mostly in tune and only a few notes go sharp.
I use white glue applied with a cocktail stick, but any glue can be used and even a bit of cheese if embarrassed by a sharp note whilst playing at a cocktail party!.

Back to Introduction page index
Back to Index page

© Mike Nelson. All rights reserved.

This manual has been put together by Mike Nelson for his own amusement :)

Go back to Mike Nelsons Home Page

This site is created and maintained by Mike Nelson for his own pleasure

© 1997 Mike Nelson