What the heck, if I was going to go to this much trouble to design a fast building Bearcat, then I might as well update the Bearcat design. It would be 10% bigger, and use a big, four stroke Saito 72, as Bill suggested. The wing would be moved forward for better appearance and balance with a heavy engine, and I would try to make it the most realistic Bearcat likely to fly competitively. It would need a new name. We called it the "BBQB Bearcat". "BBQB" stood for "Big Bearcat, Quick Build". The idea of quick building, seemed so intriguing we lined up some friends to have a "Big Build" at Bill Rutherford's shop. We would see if it was possible to sit six Bearcats on the driveway Sunday night after just one long weekend of building. To test the idea, we had a "Mini-Build" at Bill's. Richard Oliver and Bill Rutherford built one airplane while I coached and timed. We started with all of the necessary parts and jigs. It took nearly 60 hours of building to complete the basic structure. The goal was to complete the basic structure in just 30 hours. We lost some time perfecting parts which were "good enough" to just glue together. It was a neat idea, but the "Mini-Build" showed that a "Big Build" wouldn't work as planned. I still think that with all of the parts and jigs, that a 35 to 40 hour build might be possible. Well, it was still a pretty airplane. Mine took months to build. While building, I was able to refine and improve the structure and assembly process. The construction of the Bearcat was video taped for posterity. The problem is, I keep thinking of ways to improve the quick build process. So far, it seems the only way to improve the airplane might be to power it with a Saito .91. Here is one of the fruits of that exercise. "The BBQB Bellcrank". I think it has many advantages. Its light, exceptionally strong and very fast to build. It also has an unusual projection above the mount for incorporating into the fuselage, above the wing, a "hard point" for directing pull test loads directly to the bellcrank. This would not impose ANY pull test loads on the aircraft structure. It should be possible to pull 100 lbs. with nary a creak.
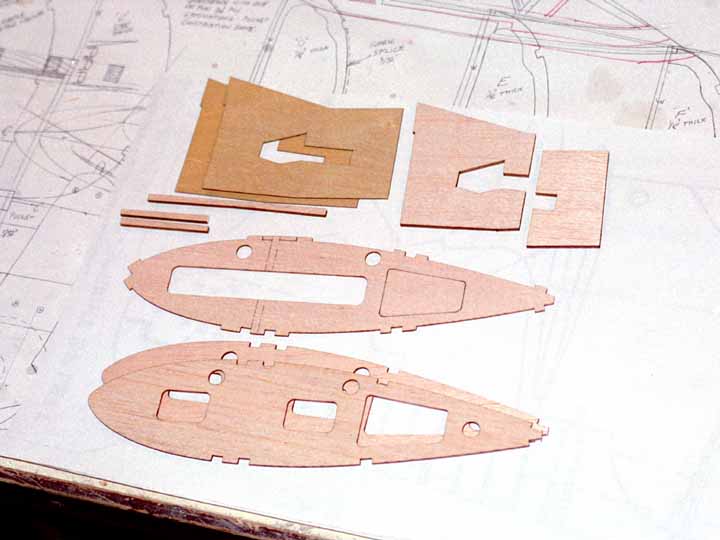
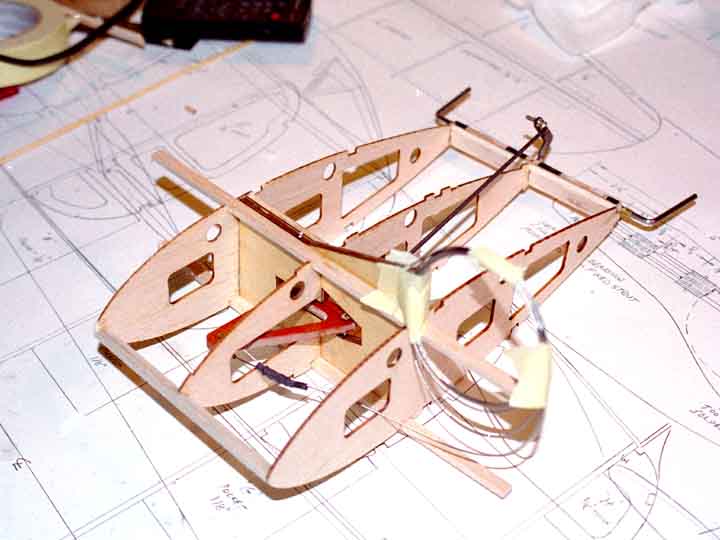
Here is a photo of the four parts of the bellcrank mount. The core is two pieces of end grain 1/8" balsa, assembled to leave a 1/8" slot for the bellcrank pivot wire. The front and back laminations are 1/32" plywood. The mount is assembled in about a minute with "slow cure CA". One advantage of the mount is it supports the pivot shaft for nearly its full length. I was always leery of bellcrank pivot shafts supported only at the top, and nearly 3" away, at the bottom, with the bellcrank in the middle. It might be too easy to bend an unsupported wire with a heavy bellcrank load. Another advantage is that the bellcrank mount glues directly to both the top and bottom spars the length of the mount. It also invites the use of auxiliary spars which would extend just a rib or two from the center or the wing. This would further distribute loads and strengthen the wing. The mount, glued front and back, top and bottom, has tremendous strength. Its 1/8" balsa and 1/32" ply structure probably weighs no more than conventional top and bottom mounts of thicker plywood. Another advantage is the ease of installing the control system in a small, easily handled module without an entire wing attached. It is a lot easier to get the control system components in that "just right" alignment by pulling the removable pivot pin and making as many adjustments to the flap pushrod as necessary. Its final advantage would be the incorporation of the provision of the "hard spot" mentioned above.
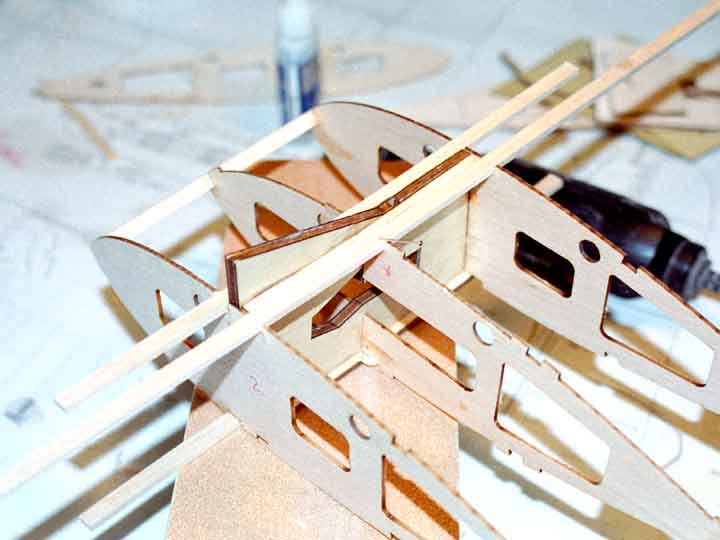
This second photo shows the mount in a BBQB Bearcat wing center section using the optional aux spars. Note the area of the top and bottom spars which will contact the wing sheeting. Two 1/4" spars and the 3/16" mount give nearly 3/4" x 5" contact area, top and bottom, for gluing. This mount installation should eliminate the possibility of wing folds on windy days.
The third photo shows two of the three center section modules. These were built to refine the structure and determine the best assembly sequence for the video. The BBQB module seems difficult to build. Actually, its easy, but only if done in a particular sequence, in a jig.
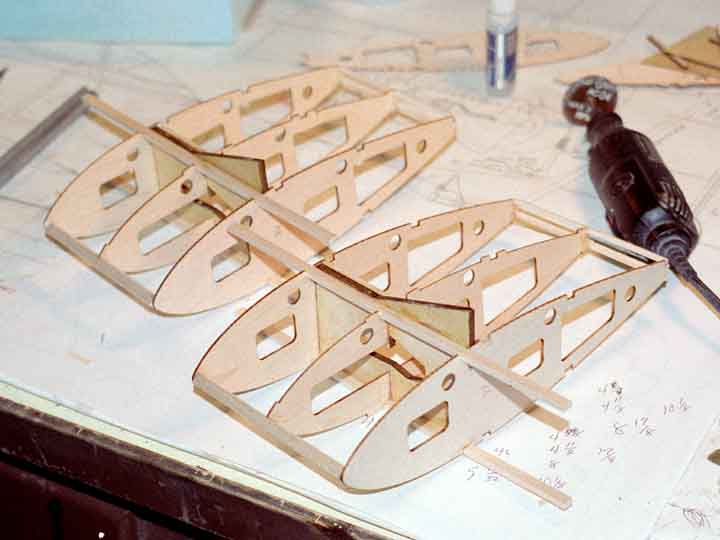
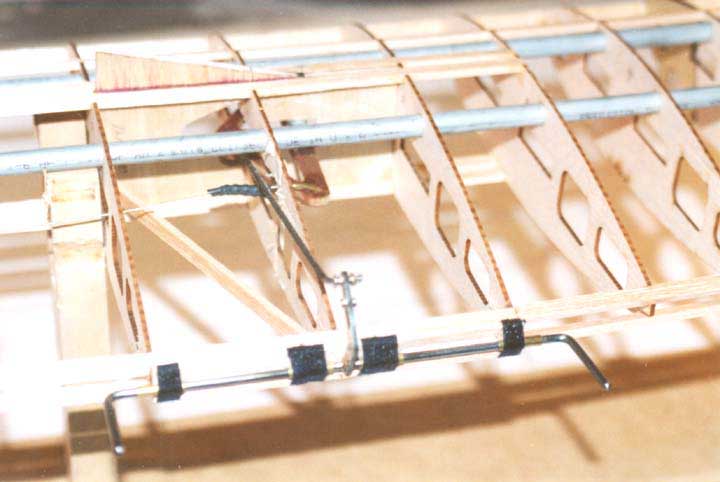
The fourth photo shows a center section module, complete with fully installed control system components. This assembly is ready to be installed onto the jig tubes. At this point, the wing mounted controls are complete, and the flap pushrod already soldered on both ends. The flap horn is permanently assembled to the wing trailing edge. Each of its four bearings are retained with many wraps of thread. This part of the airplane is finished. After the module is installed on the jig tubes, the rest of the ribs are added to the jig tubes. Finally, the wing structure will be completed and sheeted.
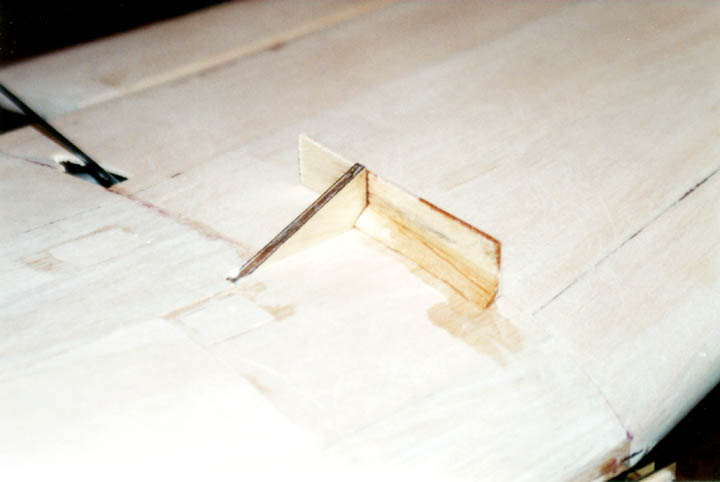
The sixth photo shows the "hard spot" projection of the bellcrank mount sticking out of the sheeted wing, ready to be attached to the inside of the fuselage shell.
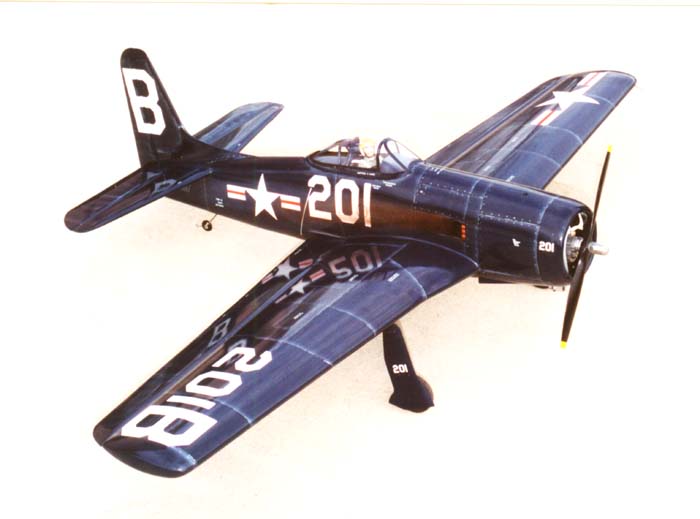
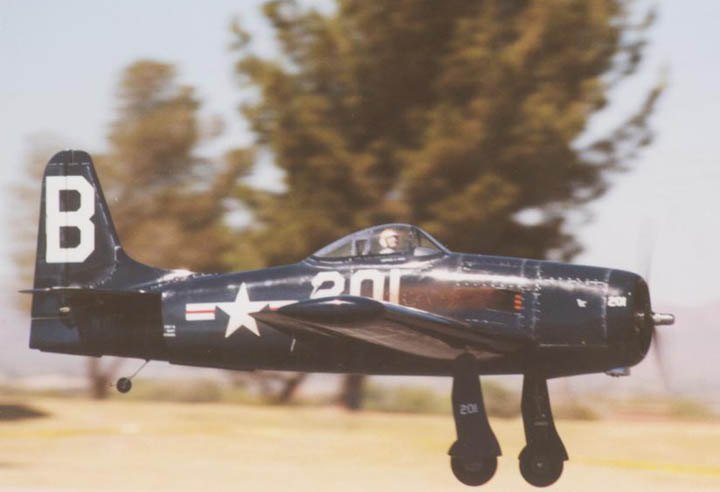
The final photo shows the reason for all this work. I couldn't be happier with the completed airplane or its engine. Its a very good competition airplane. Its stable, easy to fly, willing to turn and fun. I don't compete any longer. Richard Oliver, though, flew the Bearcat at a local contest and easily posted the highest flight score. I believe the BBQB Bearcat is a NATs/FAI quality airplane.
A final thought. By now it should be apparent that this wasn't just about a bellcrank mount. The mount, by itself, is a good one. It is adaptable to nearly any stunt ship. It might even be nice to have Kyle laser cut some mounts for typical stunt ships. If he cut them slightly oversize, they could then be trimmed on the outboard end and bottom to fit nearly any airplane. They should be cheap enough to order by the dozen like Tom's bellcrank/leadout assemblies. I love the stunt cottage industry. I quit making bellcrank/leadout assemblies and control horns when Tom's catalog advertised them for a very reasonable price and made to specified dimensions. Better him than me. Al |
 <
<
 <
<
This article was created by Mike Nelson from a submission by Al Rabe to the Stuka Stunt Forum
Go back to Mike Nelsons Home Page
This site is created and maintained by Mike Nelson for his own pleasure
© 1997/8/9 2000.01.02.03/04 mike.nelson@camcon.co.uk